Rescuing vintage microcontrollers part 3: Life at long last
In this series of posts, I’m rescuing vintage microcontrollers from their decades-long purgatory in a drawer in my local makerspace. To this end, I’m attempting to use them to drive a LED sign made of WS2812 strips
So far in this series, I found some decades-old Signetics SCN8031AH and OKI MSM83C154 microcontrollers in a drawer, and worked out that they’re 8051 and 8052 derivatives (members of the MCS-51 family) from the 1980s, and calculated that it should be possible to make them control modern WS2812 LED strips.
In this installment, I get one of the microcontrollers set up on breadboards and get it to, at last, fulfill its purpose and BLINK AN LED!
Rescuing vintage microcontrollers part 2: Can it work?
In this series of posts, I’m rescuing vintage microcontrollers from their decades-long purgatory in a drawer in my local makerspace. To this end, I’m attempting to use them to drive a LED sign made of WS2812 strips
In the first installment of this series, I found some decades-old Signetics SCN8031AH and OKI MSM83C154 microcontrollers in a drawer, and decided, without really putting detailed thought into it, that it should be possible to drive a scrolling sign made of WS2812s strips with them, much like Josh Levine does here, with an Arduino.
Before I embark on putting together hardware and writing software, though, it would probably be a good idea to do some back-of-the-envelope calculations to check that this can actually work. Are these 40-year-old components actually fast enough to communicate with modern LED controllers?
Rescuing the makerspace's vintage microcontrollers
I recently joined my local makerspace, and one of the exciting1 things there is this shelf of electronic components, available for all members to use:
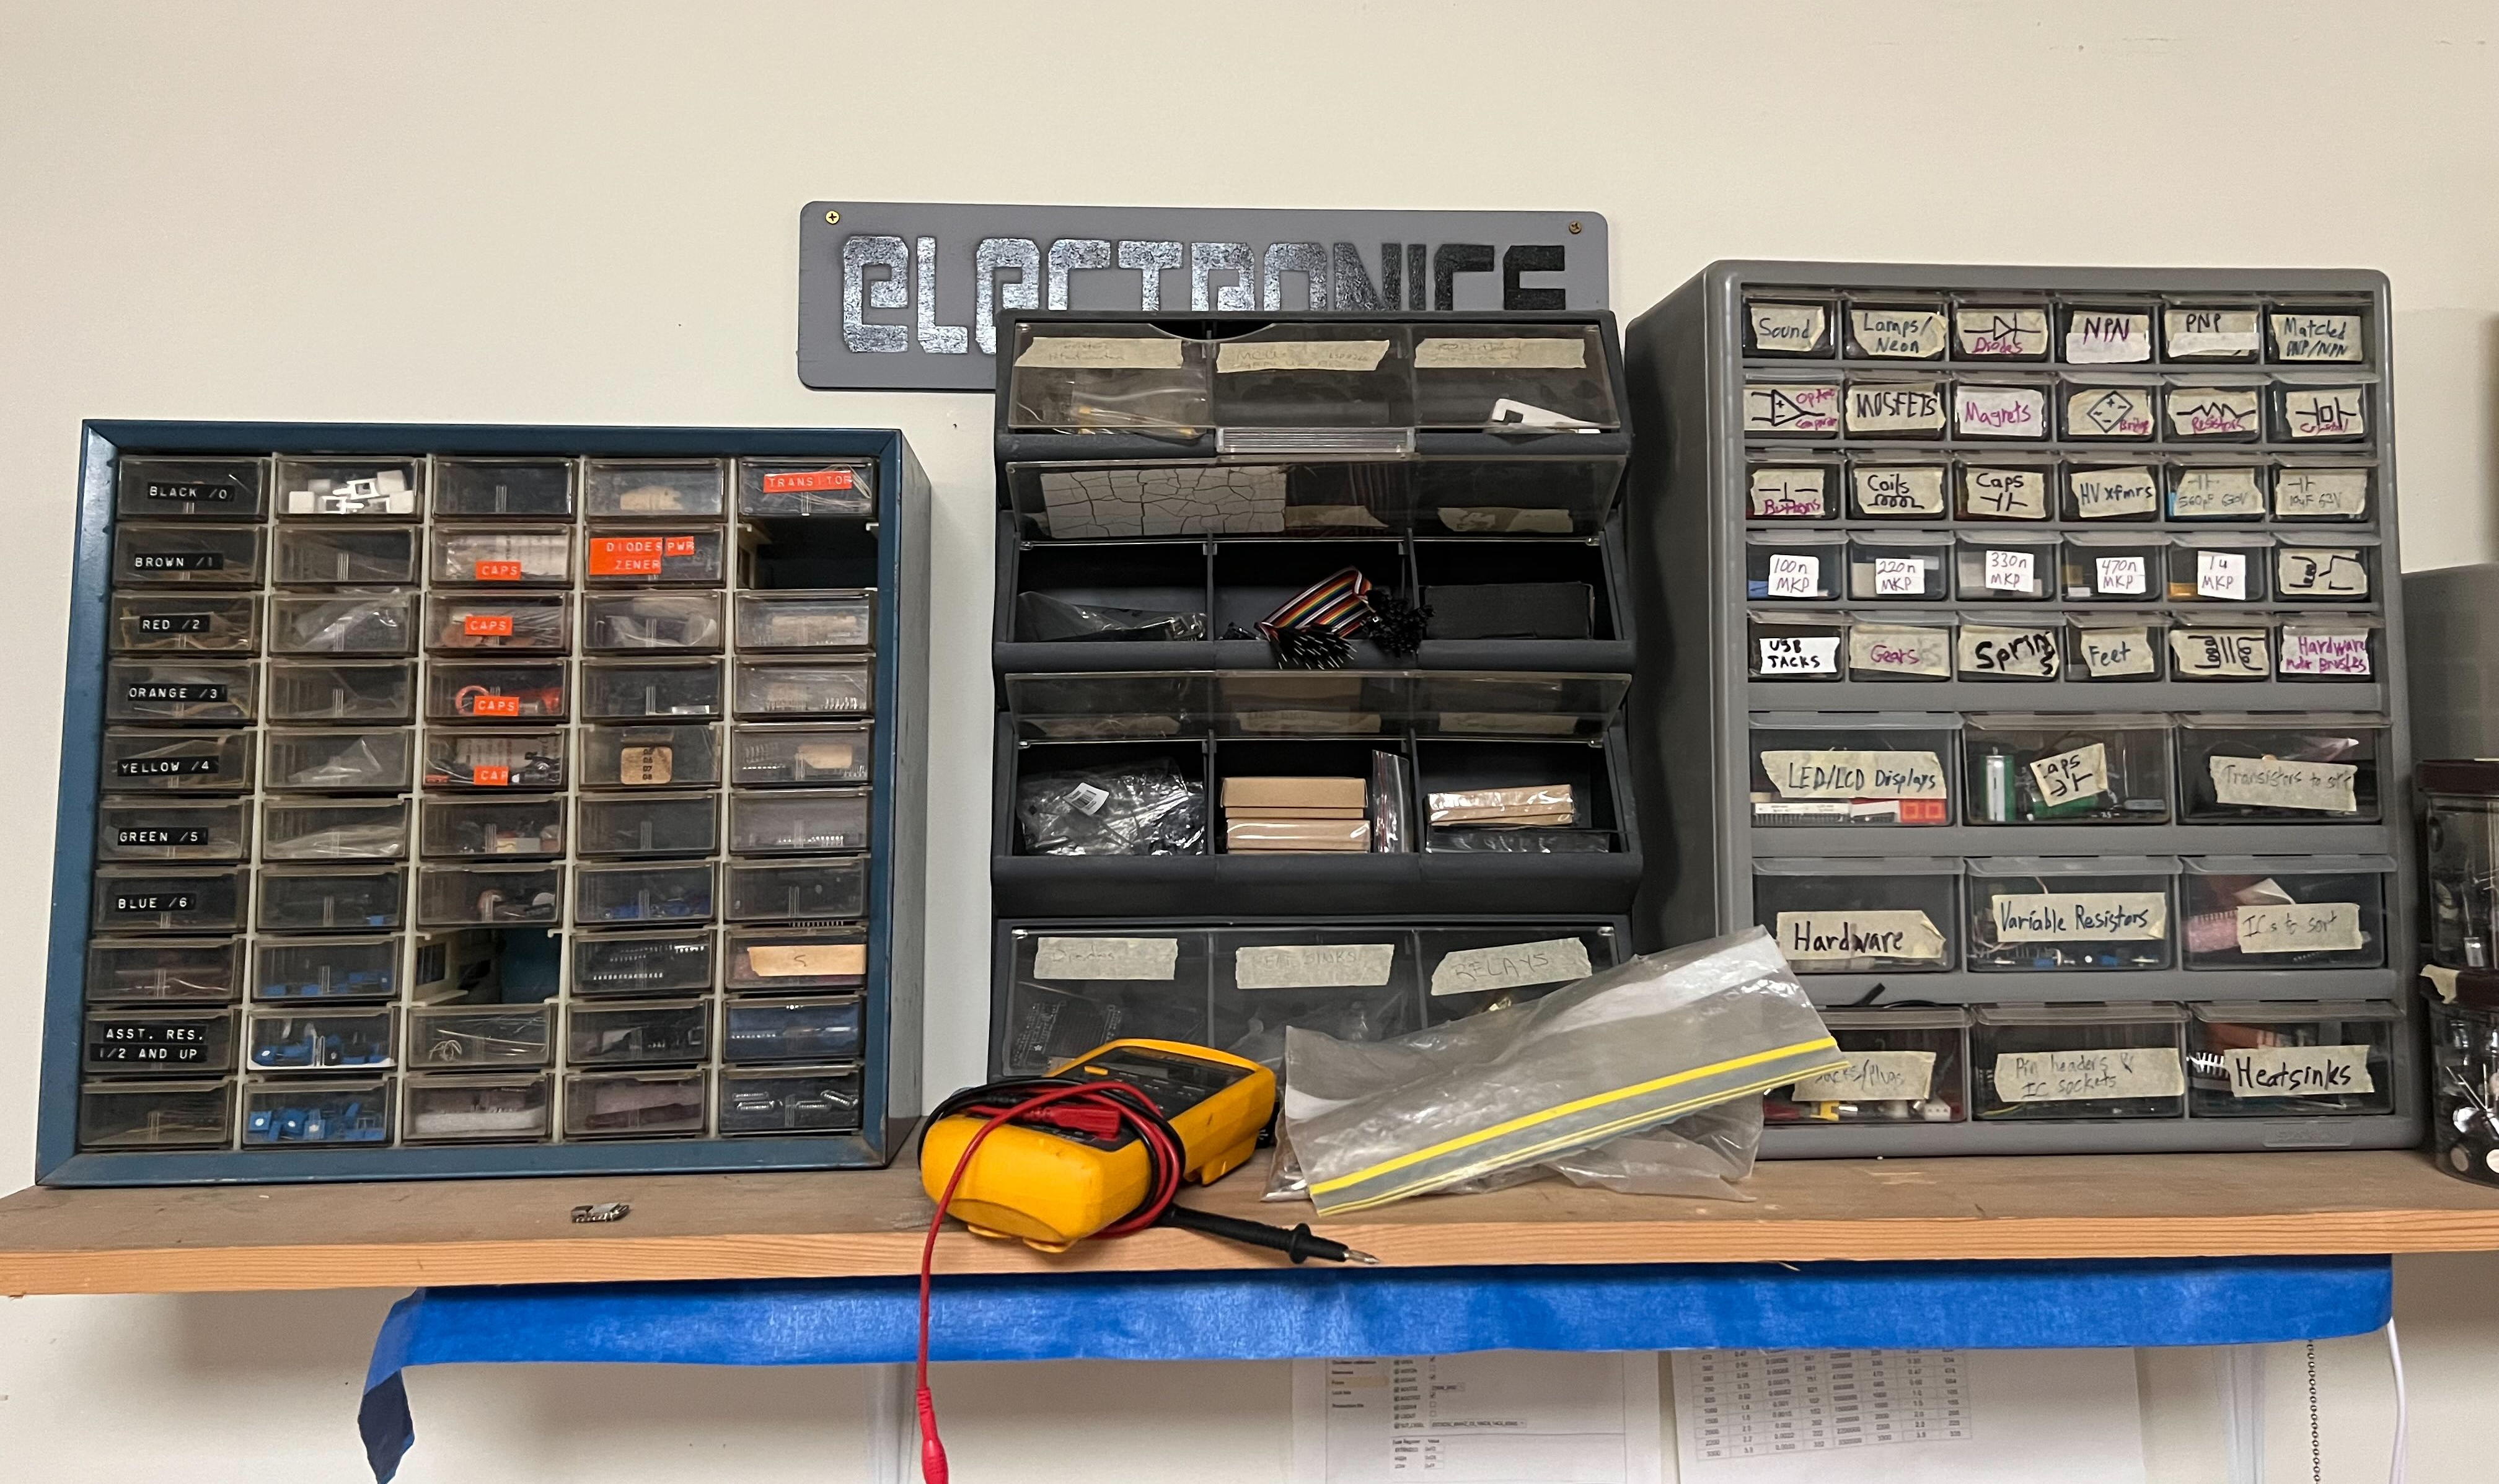
I felt a bit like an archeologist going through these. Everything in them, apart from some Arduinos and Raspberry Pi related stuff in the middle shelves, seems to be at least thirty years old! There’s the usual selection of resistors, capacitors, transistors, and other small through-hole components. Among the more complex things, a lot seems to be loosely audio-related - amps, signal generators and the like (I bet someone could make some cool synths!). There are a load of old-school UV-light-erasable EPROMs.
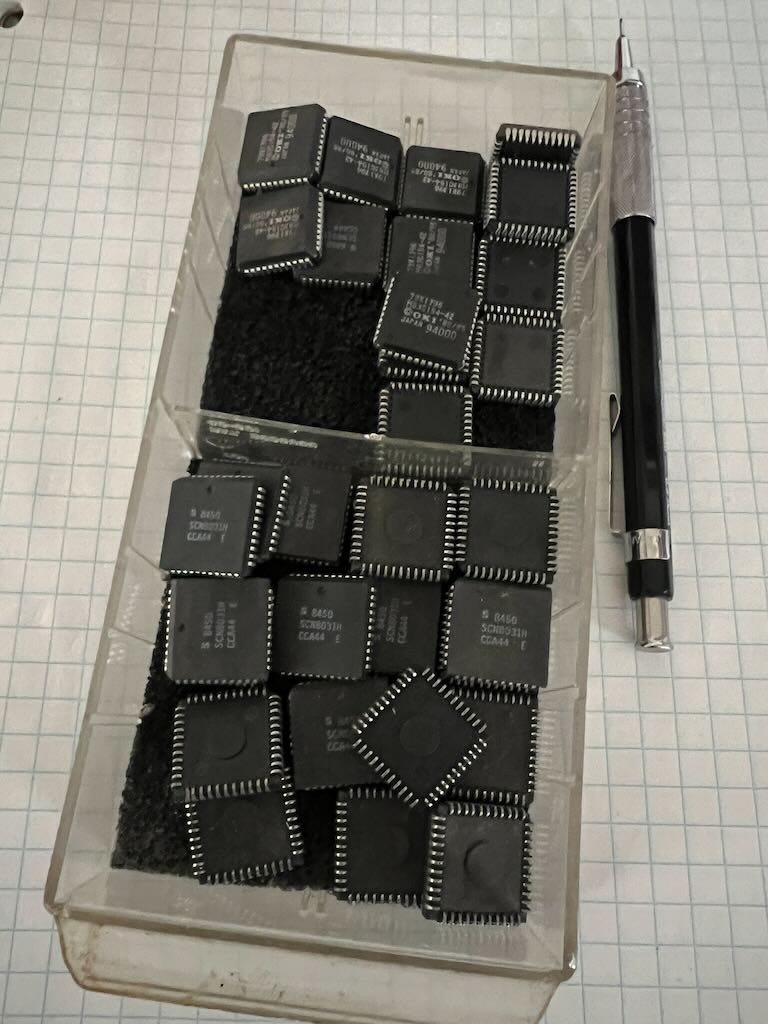
What interested me most, though, was a huge stash of PLCC ICs. Just look at this!
Giving a rootful Podman container its own IP
I went on a bit of a journey this week - moving our Pi-hole from its own dedicated device1 to a container on our home router. I still wanted it to have its own IP, and to still be able to serve DHCP and DNS. And I wanted the host machine to be able to use it. And I wanted to use Podman to host it, first because I’m using it for other things on this machine already, and second because I didn’t really want the Pi-hole machinery to have root privileges on the host (I am running Podman as root to allow it to open DNS and DHCP ports, but using UID mapping to ensure that the contents of the container are not root).
There are a lot of incantations out there on the Web (and, so, in AIs) for getting Podman containers to have their own IP. Most involve using macvlan or ipvlan. They all, though, seem to have the drawback that, while the container gets its own IP that the rest of your LAN can see, the host machine can’t see it! The canonical way to fix this seems to be to set up a ‘shim’ where your host gets a second IP, and you set up manual routing. I tried this, and it works, but, well, ick. And there are practical drawbacks to your host having two IPs - nothing that can’t be worked around2 but, again, ick. Also, IPv6 autoconfiguration doesn’t work.
Turns out there is actually a much cleaner way to do this - it’s just apparently not well known, and unfortunately, that it’s a good idea was ‘hidden’ by a bug in Netavark (the network management infrastructure used by Podman), which didn’t let you set it up - and implied you were doing something bad.
Setting up a very simple (but IPv6 capable) home router with OpenBSD 7.7 (or 7.8!)
[When I wrote this post, I used OpenBSD 7.7. In the less-than-a-month since I posted this, OpenBSD 7.8 has been released! I’ve upgraded my router, and all the advice below is still applicable with 7.8]
I’ve just replaced our old home router with a tiny OpenBSD router, and I’ve been surprised and delighted by it.
The old router - a TEW813-DRU - was getting long in the tooth. Made in 2014, it was relieved of WiFi gateway duties when the pandemic demanded less glitchy videoconferencing than it could support1, and was only still around because it can route full gigabit to the WAN port2 - and perhaps more importantly, allows DHCP to be switched off so that our Pi-Hole can take over that task, along with DNS resolution. For a long time, it also routed IPv6 very happily - but that seemed to break somehow a year or so ago (I suspect config changes at our ISP), so we’ve been IPv4 luddites since then.
Why BSD? I guess I’d have to admit that I have an affinity for oddball setups - but I also wondered if it’d be simpler than a Linux solution. I love Linux - in fact, this router is running in a VM on a Linux system that’s also running Home Assistant (more about that in the future, perhaps), but over time distros have become super complicated. BSD has a reputation for being ‘simpler’.
Often, my oddball setups mean a bunch of wasted time and a return to the mainstream, but I’m happy to say that I do not regret this choice at all. OpenBSD is wonderful for this task. It’s small. I allocated 512MB of RAM to the VM, and it’s using 183MB of it. It’s using about 2G of disk space, without really any attempt on my part to keep it small beyond the obvious (no windowing system or games installed). Installation was super simple3.
Setting up Gentoo Linux on UTM on Apple Silicon
These are my notes on setting up a ‘headless’ Gentoo Linux installation on UTM on my Apple Silicon Mac, with the Apple Virtualization ‘backend’.
I’ve updated these as of December 3rd 2024.
Coolson’s 10th Anniversary
Ten years ago, my wife Emily and I made two games: Coolson’s Artisanal Chocolate Alphabet for iPad, and Coolson’s Pocket Pack, for iPhone (and iPad). Coolson’s Artisanal Chocolate Alphabet won a BAFTA, and was for a while featured on Apple’s iPad web page!
I recently spent some time lightly remastering both games for modern devices, and they’re now back on the App Store, and free!
Coolson’s Artisanal Chocolate Alphabet now works on iPad and Apple Silicon Macs, and Coolson’s Pocket Pack now works on iPhone, iPad and all Macs (the Mac version is a great distraction when you need some down-time at work!)
I’m not sure how many people who know Em and me actually know about our past lives as award winning(!) indie game developers - so I thought I’d write a bit about it here. I found a surprising number of pictures too!

'Instant' Resistor Measurer
This project is a little old, but now that I have some time, I thought it would be nice to write it up! The device has been serving me well for a few years now.
Being somewhat red/green color blind, I’ve always had trouble reading through-hole resistor color codes (though I often wonder if those with full color vision have it much easier - some resistor bands are so ‘muddy’!) I make do with labeled pouches holding my resistors, and a multimeter to double-check. The multimeter is so slow. Surely it shouldn’t take seconds to sense a resistor value!
For years I dreamt of making a faster resistor measuring device with an instant readout.
The ‘final straw’ that pushed me to actually do that was that I bought a beautiful old metal Akro-Mils cabinet1 stuffed with old through-hole carbon composite resistors at the Silicon Valley Electronics Flea Market. The resistors were obviously sorted in the drawers at one time - but time and chaos had taken their mysterious toll, and they’d become pretty substantially mixed up.
I needed to sort these hundreds of resistors if I was to ever use them. With the multimeter, that would take for ever.
The ‘resistor measurer’ I built (call it an ohmmeter if you insist) works really well. It measures the value of a resistor fast enough to seem instant, and it optionally rounds to the nearest E24 or E96 value. I also designed and 3D-printed a benchtop case for it.
I’m quite pleased with the circuit I came up with to measure the resistance!
Switch Dual Shock adapter part 7: Iteration
In this series of posts, I’m attempting to make a Dual Shock to Switch controller adapter. It will plug into the Switch Dock’s USB port.
It’s been a couple of weeks, and I’ve still be working on the Dual Shock to Switch adapter in between using it to play Zelda. I’m glad to report it is very reliable!
I want to write about the changes, but I won’t go into as much detail as I did in previous posts. Earlier, I wanted to document the use of V-USB, get into details of the Pro Controller, and just generally document as I explored how to go about a project like this. But the project has now got to the stage where in-depth exploration of the changes is getting less and less interesting.
So, instead, I’ll just write a little about the latest changes, and you can take a look at the source (or get in touch!) if you’re interested.

Switch Dual Shock adapter part 6: Dual Shock
In this series of posts, I’m attempting to make a Dual Shock to Switch controller adapter. It will plug into the Switch Dock’s USB port.
So far, I’ve got a nice, efficient, fake Switch Pro Controller running on my breadboard. But it doesn’t do anything useful - it just fakes out left and right dpad presses. In this installment, I’ll connect a Dual Shock to it!

…and play Zelda!